How to Move from Word to Wordex: A Practical MoonlitFlow Guide

You already have a manuscript in Word. The figures are in place, collaborators have revised the discussion, and a publisher has supplied a LaTeX template. Starting again from a blank source file would throw away useful work.
MoonlitFlow offers an Import document with AI workflow for creating a new editable LaTeX project from a Word document, PDF, or page images. You review the converted LaTeX before creating the project, then continue editing supported content visually in Wordex.
Conversion is a starting point for a manuscript review. Equations, references, tables, and the final publication layout still need your attention.
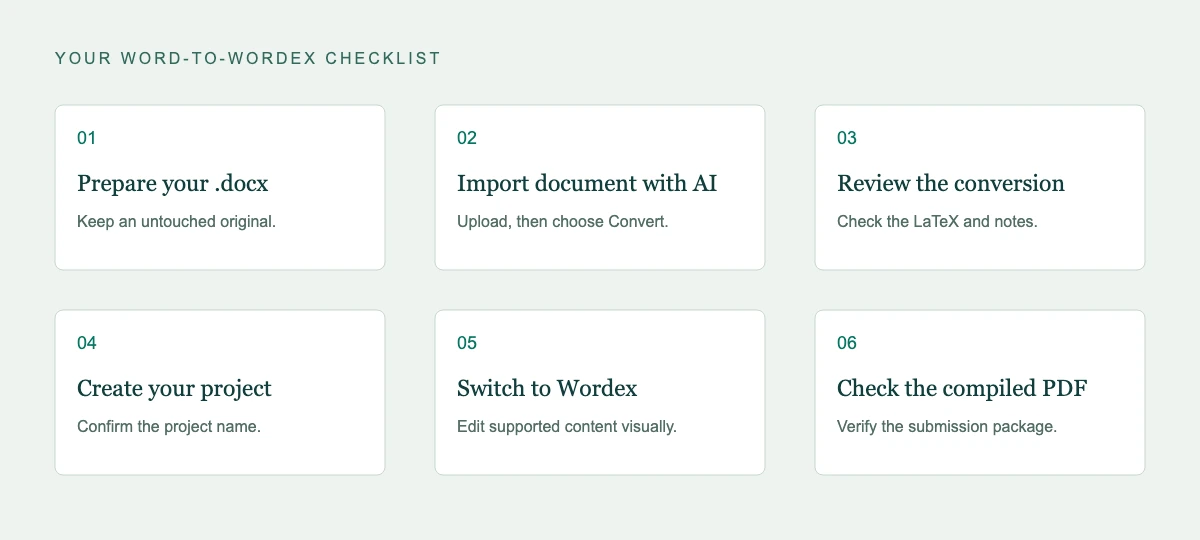
1. Prepare a clean Word copy
Keep an untouched copy of your original manuscript. Save the version you want to import as .docx; older .doc files should be saved as .docx first.
Resolve tracked revisions into the version you intend to convert. If comments or alternative wording contain information you still need, keep them in the original or in a separate note. Do not assume review history will become editable LaTeX revision history.
Use recognizable heading styles, check equation content, and keep the original figure files nearby. Make sure the reference list contains enough information to identify each source after conversion.
2. Open the AI document importer
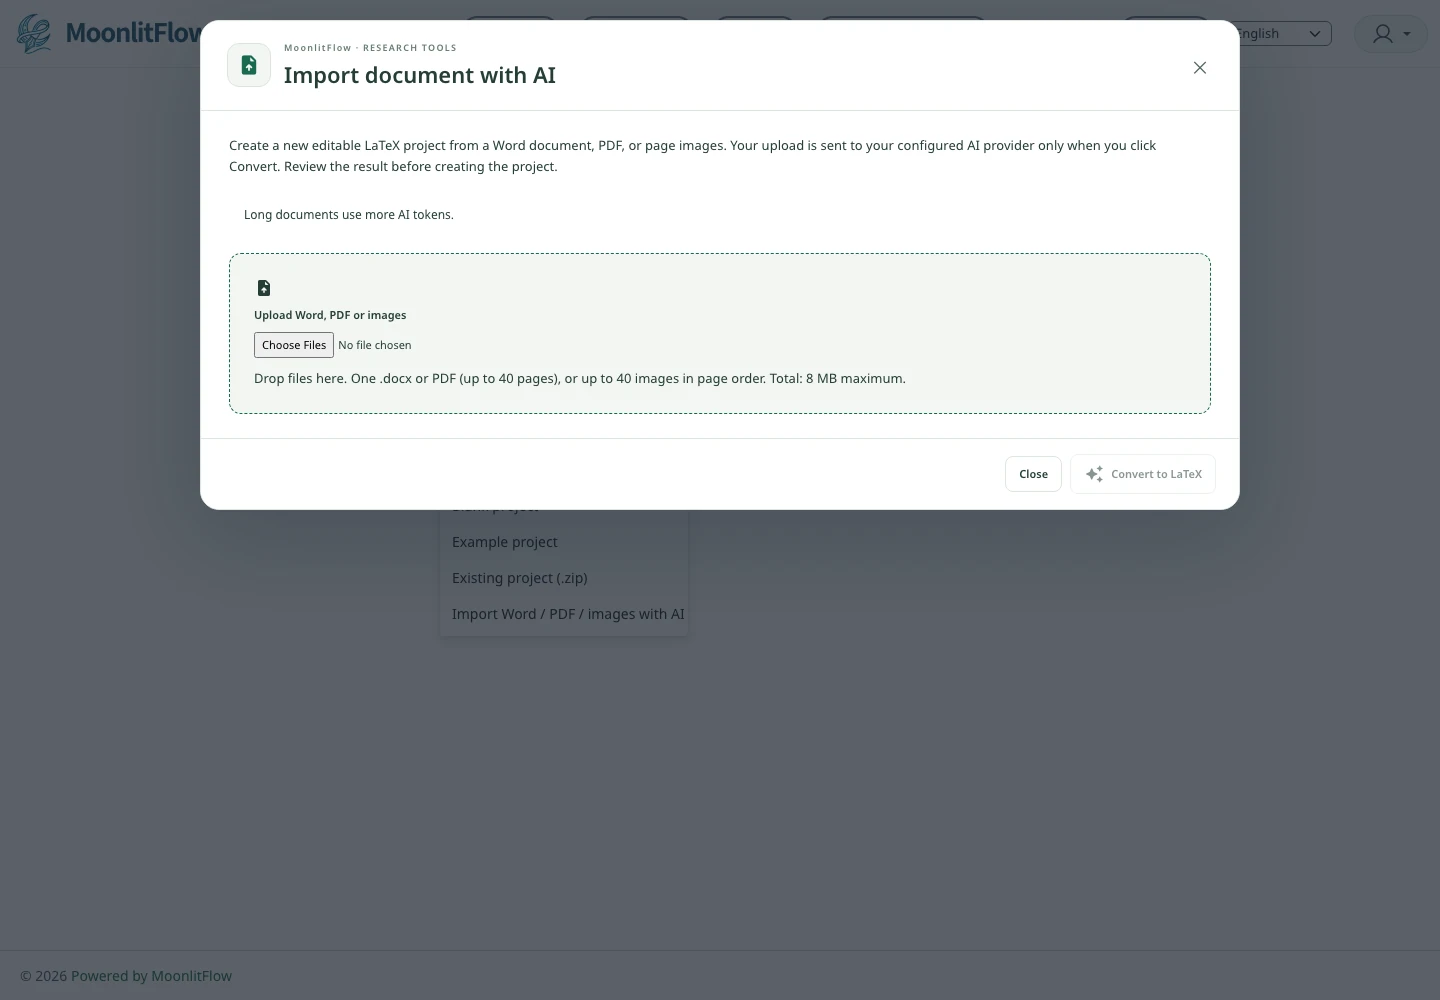
Sign in to MoonlitFlow and open the projects page. Use the New Project menu and choose Import Word / PDF / images with AI. The dialog is titled Import document with AI.
For the workflow described here, choose this AI importer rather than the separate Word-document import option. The AI dialog includes a review stage before project creation.
Upload one Word document or PDF, or supply page images in reading order. The current dialog supports a document of up to 40 pages, or up to 40 images, with an 8 MB combined upload limit. It accepts .docx, PDF, PNG, JPEG, and WebP files.
Longer documents use more AI tokens. For a large manuscript, work on a manageable section first and inspect the conversion before committing the full project to this workflow.
3. Convert, then review the LaTeX
Select Convert to LaTeX. The dialog states that your upload is sent to the configured AI provider when conversion begins.
When conversion finishes, review the conversion notes, listed figure assets, and the Review and edit LaTeX area. No project is created until you choose to create it.
Check these items against the original:
- Headings and paragraphs: Is the hierarchy correct? Is any text missing or duplicated?
- Equations: Check symbols, indices, fractions, matrices, and equation numbering.
- Tables: Check column alignment, merged cells, units, headings, and notes.
- Figures: Check the images, captions, and their relationship to the surrounding text.
- Citations and references: Confirm that the correct sources are cited and that the bibliography is complete.
- Special characters: Check accents, Greek letters, Chinese text, and other scripts in both the source and the compiled result.
AI conversion can misread a symbol or infer the wrong structure. Correct those issues before treating the project as your working manuscript. Use Convert again if you need another conversion attempt; review the new output rather than assuming it is better.
4. Name and create the project
Choose a clear project name, make any necessary corrections in the LaTeX review area, then select Create project.
The importer reports that original uploads are kept in the new project and lists the generated figure assets. Retain your independent original copy as well. If project creation returns a warning, read it and use Open created project when offered rather than creating duplicate projects.
5. Select Wordex and continue writing
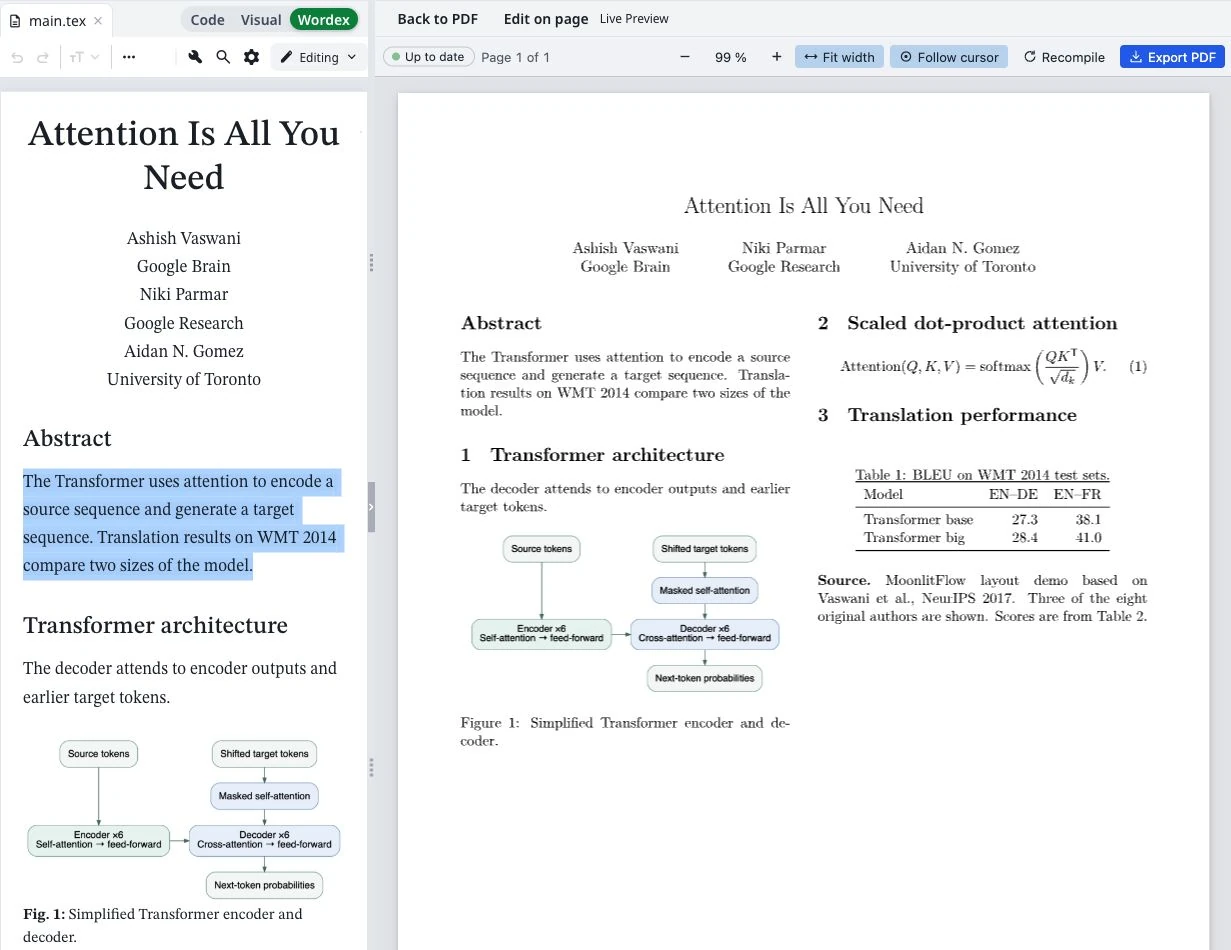
Open the main .tex manuscript file and select Wordex beside Code and Visual. You can now revise supported prose, headings, equations, tables, figures, and citations through the visual editor.
Your edits update the LaTeX source. Use Code when you need to inspect a command, adjust a package, or work with a construct that Wordex does not edit visually. A conversion does not automatically make every custom template feature visually editable.
MoonlitFlow’s AI writing tools can help with grammar, paraphrasing, and translation after import. Review suggestions against the research; conversion and polishing do not validate scientific claims or reference accuracy.
6. Check the template and compiled PDF
Importing a document creates a new editable project. It does not guarantee that the result implements your target journal’s class, bibliography style, or submission rules.
Compare the converted project with the required template. If your venue requires a particular class or source package, adapt the converted content carefully, using Code where necessary. Changing a class name alone may not produce a compliant manuscript.
Compile the project and inspect the PDF from beginning to end. Check missing figures, unresolved references, equation placement, font rendering, page breaks, and the bibliography. Resolve compilation errors before preparing the final deliverable.
Use the editor’s PDF export control for a PDF copy. When a submission also requires source files, include the necessary TeX, bibliography, figures, and local class/style dependencies, following the venue’s instructions. Keep the Word original until you have checked the final package.
The aim is to carry your existing manuscript forward into a project you can edit visually and inspect as LaTeX.
Open your MoonlitFlow projects or see how Wordex works.
Further reading: Word vs. LaTeX vs. Wordex: Which Should Researchers Use in 2026? · Your Next Paper Belongs in Wordex.